Scanning
To get the best results from PPRC, scan with TLXClientDemo and save as planar raw files with file headers. Here’s the process:
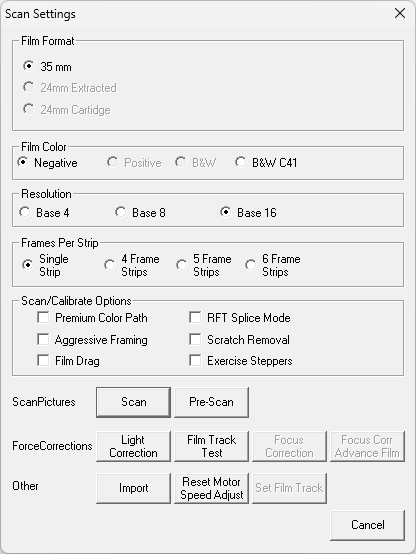
1. Scan your negatives
- Run TLXClientDemo
- Click “Scan”
- Select Film Color: “Negative”
- Choose any Resolution
- Choose the appropriate “Frames Per Strip” option
- Optionally enable “Scratch Removal”
- Click “Scan” and let it complete
2. Move to Save Group
Click “Move Oldest Roll in Scan Group To Save Group”.
You can now review your scans using “Previous” and “Next”, optionally correct framing, and rotate images if needed.
3. Save as planar raw
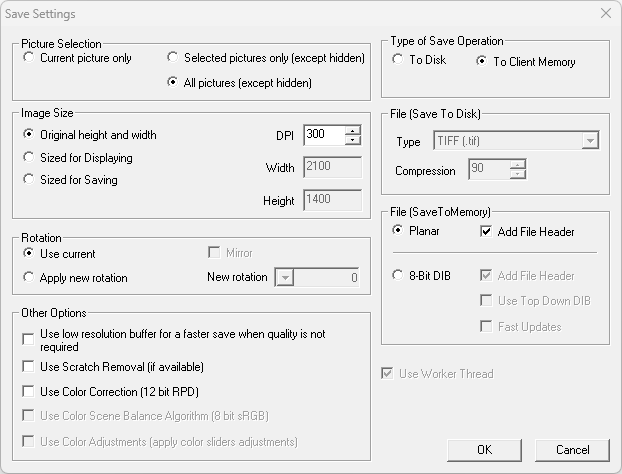
- Click “Save” and set the save options:
- “All Pictures (except hidden)”
- “Original Height and Width”
- “Other Options”: uncheck everything except “Use Scratch Removal” if enabled
- “Type of Save Operation”: “To Client Memory”
- “Planar” with “Add File Header” enabled
- Click “OK”
Once complete, C:\Temp will contain your 16-bit planar raw files, ready to copy to another computer and process with PPRC.
Scratch removal
Enabling “Scratch Removal” at the scanning and saving steps lets TLXClientDemo remove dust and scratches automatically. Note: there is currently no way to export the IR scan data with your .raw files.